🚀 Three Slack Automations to Power Your Company


😤 Today, we’re covering all things Slack!
Thanks for making it with us to our second post. Today, we’re tackling a beast of a topic – automations with Slack. To be honest, we could probably make an entire course on how to think about enhancing and automating your workplace with Slack. Slack has become the go-to remote work comms tool for businesses around the globe, and it plays a critical role in culture building, communications, and information management for distributed teams.
Since this is an email and not a course – we’re going to keep it short, sweet, but impactful. We’ll cover three high-level ways to think about Slack automations that we hope unlock a world of possibilities for you to consider implementing in your own teams/workspaces. Broadly speaking, here are three ways we think about automations with Slack:
3rd party triggers that automate Slack interactions/data scraping
Internal message/action triggers that automate data storage/actions
External triggers that automate notification messages
And we have another bonus for you this week: some ideas for how to utilize native Slack automations!
P.S - While we’re using Slack for this newsletter, you could swap out Slack and insert either MS Teams or Discord if those are your preferred tools of choice!
Let’s dive in 😉
📭 Automation 1: Mail Merge for Slack - Sending Personalized DMs Automatically
💡 If you’re not familiar with ‘mail merge,’ it’s the original easy way to personalize emails to a group of people all at once. A quick briefer on mail merge for the uninitiated: you put everyone’s email in a column on a GSheet. Then, you put the different personalized variables in adjacent columns on the spreadsheet (e.g., first name, city, intro sentence, etc.). Once you have all the data stored in the spreadsheet, you can use those column variables in a format by indicating variables with {}. For example, your opening line is often:
Hey {{first name}},
and the mail merge will replace that “{{}}” text with the corresponding value from that row in the spreadsheet!
Now follow along below to create your own automation using Phantombuster and Slack!
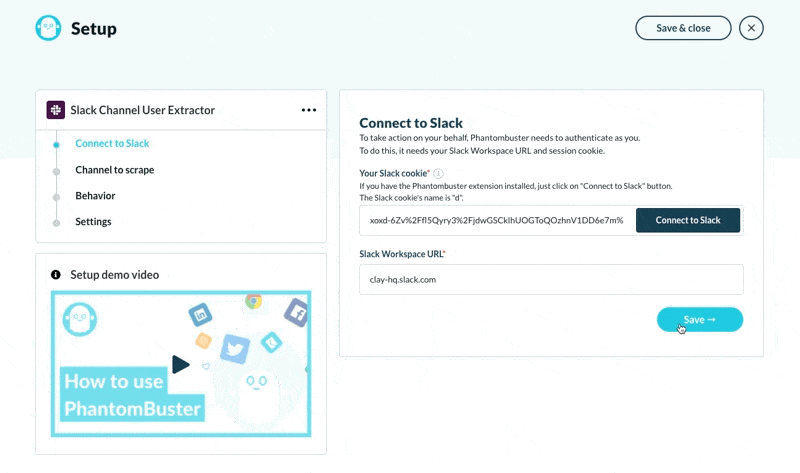
First, create or log-in to your account on Phantombuster and use Phantombuster’s Slack Channel User Extractor. Follow the set-up instructions and connect to your Slack account (download the Chrome extension first), paste your Slack workspace URL and specify the channel name. 📶

Once the set-up is complete, download the CSV and import those results into a fresh Google Sheet. ⬇️
Copy and paste the users you specifically want to send a message to in a separate sheet (with corresponding user IDs - be sure to include that whole column). 📄

Go back to Phantombuster and use their Slack Message Sender. Follow the same set-up steps, and when you paste the GSheet URL, be careful to paste the URL of the tab with the people you want to message. ✏️

Now it’s time to write your custom message mail-merge style for each user (if you’re not familiar with mail merge, check out YAMM). 📩
‘#’ indicates where custom text gets included. For each place there is a ‘#’, make sure there is a corresponding column in your extraction tab with the same language. For example, if your custom text is #product#, make sure there is a column with the header “product” that has the text you want to send to each person in the sheet. Here are a few example messages you could send:
“Hey #firstName#, I saw that you said the session last week was #feedback#. I’d really love to schedule a time to talk with you on #day# next week if you’re open to it!”
“Hey #firstName#, I saw that you responded to my tweet about #subject#. Would love your thoughts on the product we’re building at #company#. Here’s a video of me giving a demo of the product #loomVideo#. Let me know if you have time next week to chat about it, or find a time on my Calendly here #calendly#:
“Hey #firstName#, it’s been a month since you joined our community, and when you signed up, you said you were excited to: #firstWeekMessage#. I’d like to check in on that and see if the community is helping you achieve those goals, and if you have any feedback on how we can create a better experience for our members. Here’s a Thanks!
Bonus: you can use =CONCATENATE() and custom field variables to draft pseudo-personalized text more easily.
Make sure to test your message before sending, so you don’t have erroneous spaces etc. in your messages. And click run! ⚡️


Here are a few use cases for which you could use this automation:
Community Building
If you’re building a community in Slack or are an all-star networker, this can be a light-weight way to keep up relationships with your members.
This could be useful in onboarding to create a more personalized experience for new hires or new community members
Growth Hacking
Slack (or Twitter, Facebook, Instagram) could be interesting forums to find and engage with new leads at likely higher response rates than email or LinkedIn.
On Twitter, Instagram and Facebook, this could be used to respond to anyone who engaged with a specific post.
For Managers
If you’re managing a big team, this will be helpful to keep tabs on your direct reports and check in at various cadences.
If people didn’t respond to your channel-wide request, you could use this to get people to respond or take an action via a personalized DM.
🗓️ Automation 2: Store important Slack messages
For our second automation, we’ll show you how you can add an emoji to a Slack message to store it in a database. This could be useful for tracking bug reports, support tickets, product ideas and more.
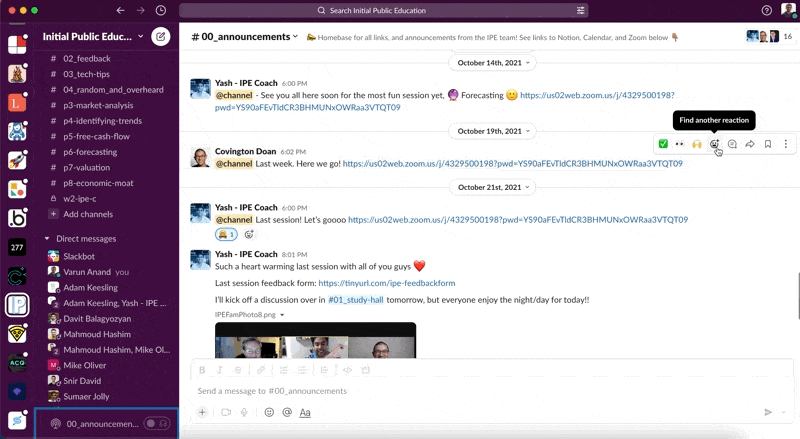
Log into Zapier and connect to your Slack and Airtable accounts (select Slack reaction as the trigger). Pick an emoji and channel in Slack (we chose a custom bowtie emoji and the announcements channel):

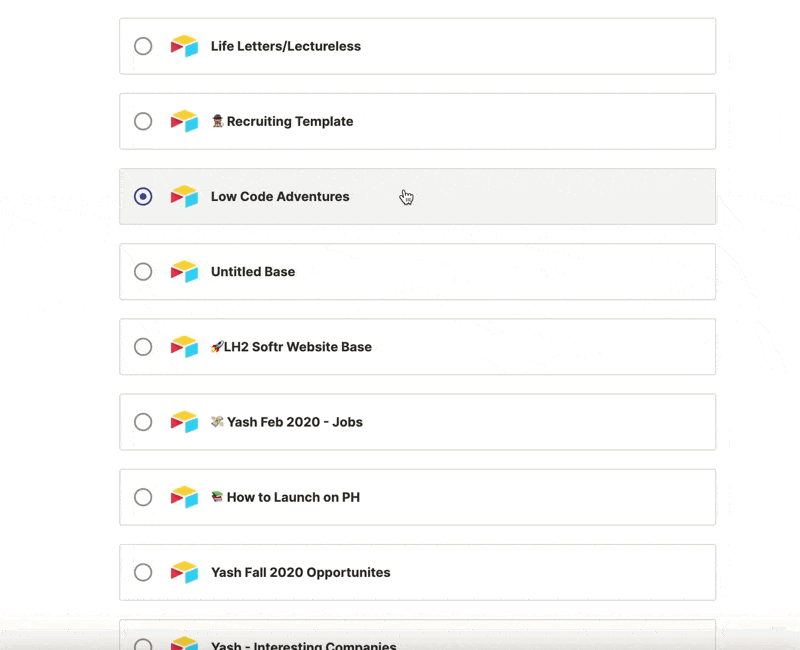
Now it’s time to connect to Airtable! So pick the base and table you want the message to be added to, and map the message to the appropriate fields in the Airtable.

Then you can test your Zap by adding the emoji to a message and it should create a record in Airtable! ✨


💸 Automation #3: Stripe —> Slack Notification Integration
For our final automation, we’ll show you how to connect different applications together to create a notification within Slack. In this one we’ll show how you can celebrate when you get paid 🏦
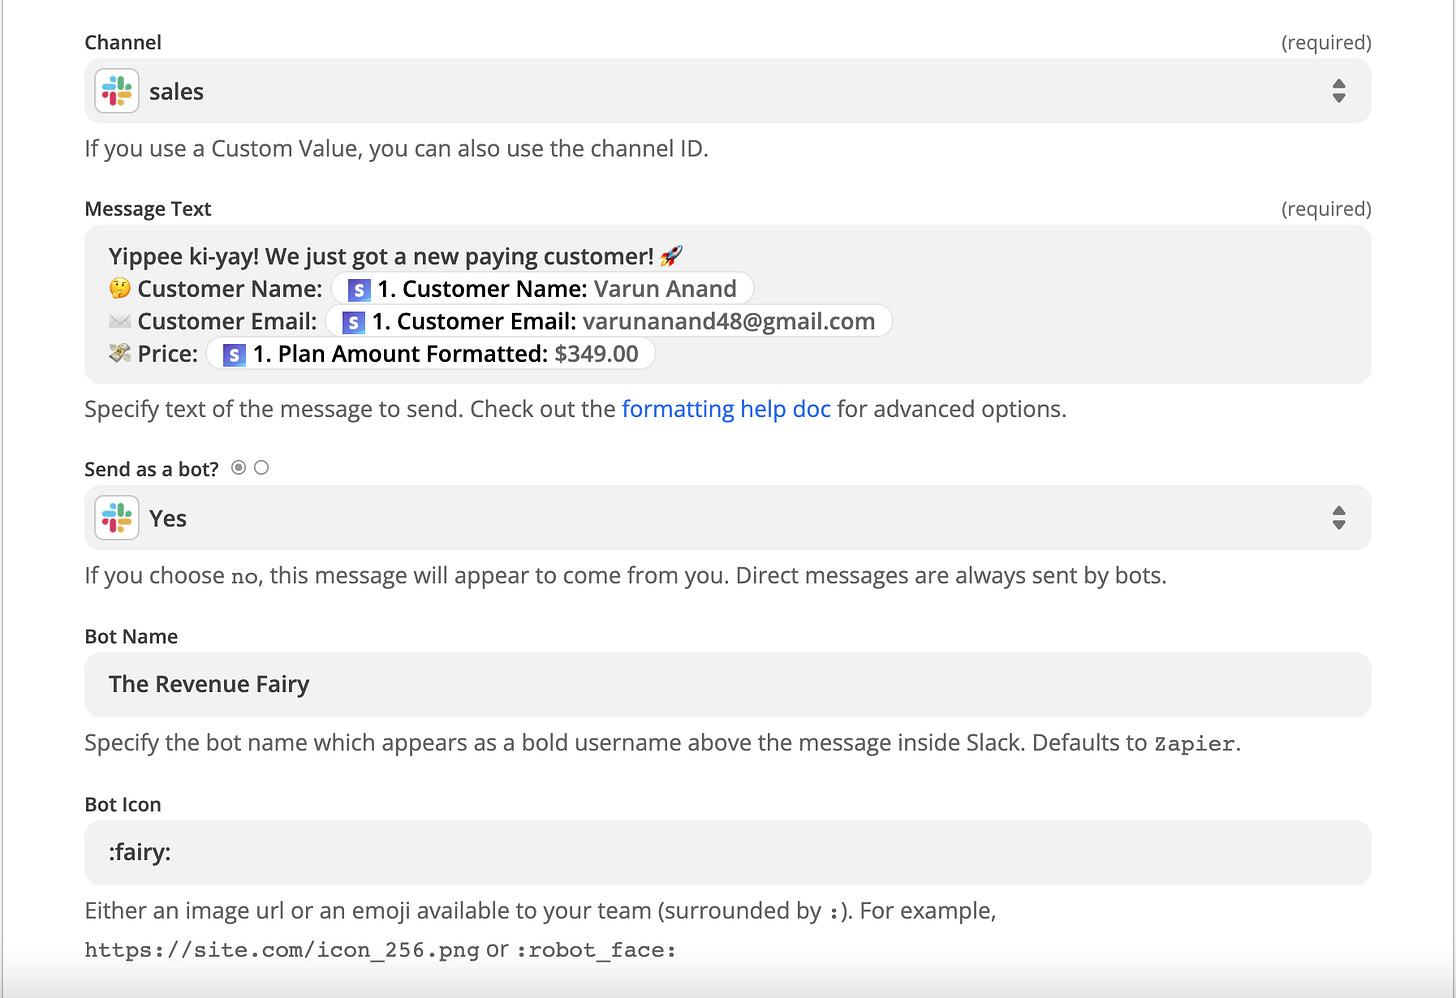
Log into Zapier and connect to your Stripe and Slack accounts. Choose how you want your message to be sent and then fill out the settings accordingly (see below for how we did it):
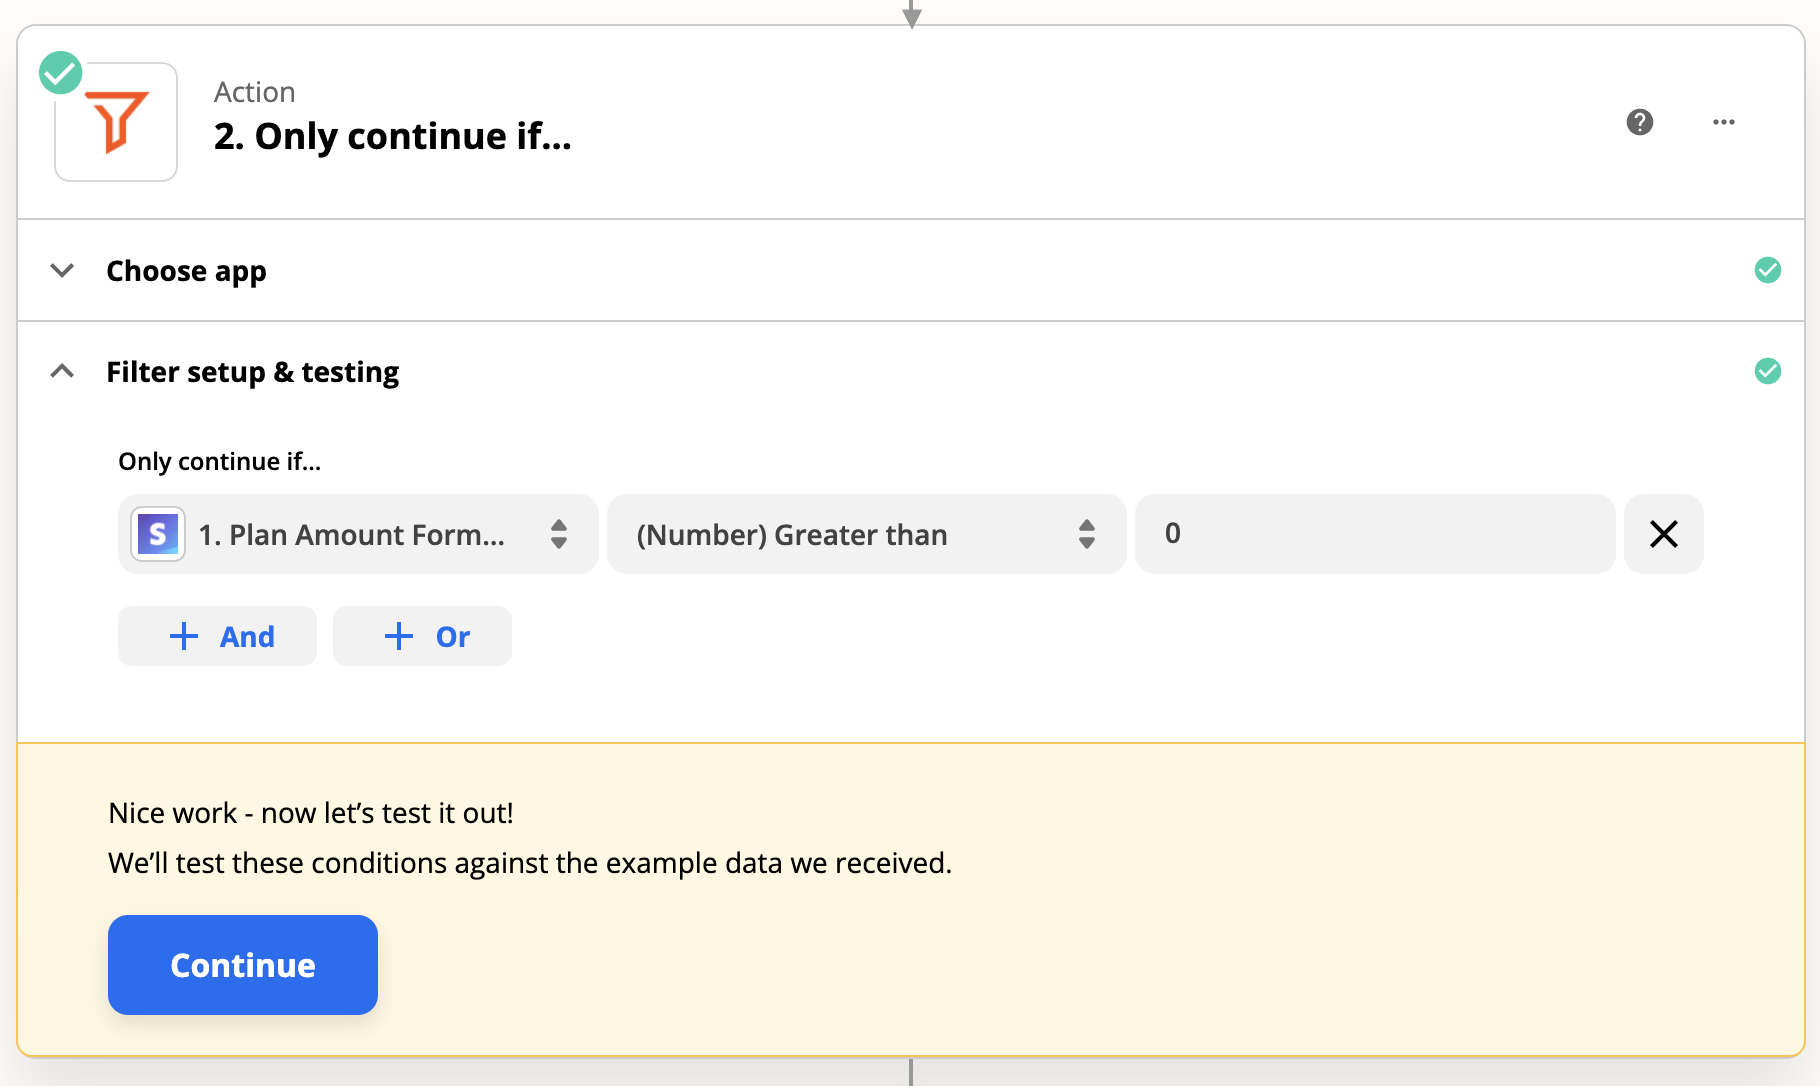
From there you’ll need to run a test. For us, we only wanted to show paid Stripe subscriptions, so we edited the Zap, and added a filter to only run the Zap if the [plan amount formatted] was greater than zero.

Now that we added a filter, we needed a new Stripe test to make sure the Zap is working correctly. So we went back into Stripe, created a new paid subscription, ran a new test and updated the fields accordingly. And then voila✨


💪🏽 Bonus: Native Slack Automations
At the end of 2019, Slack released Workflow Builder, a native automation tool. Since then, workflow builder has grown tremendously, even featuring templates made by other teams around the world for you to modify to your liking. Workflow builder isn’t necessarily intuitive to find in your slack workspace, so here’s how you get to it 👇🏽

Once you’re in workflow builder, you’ll notice there are a lot of options for actions you could take! Rather than start from scratch, Slack also has a public library of templates available for you to get started, which you can find here.
For example, you could download this send information to Google Sheet template, which allows any user on the team to simply click the shortcut button for a message and automatically send it to a Google Sheet.
You can use the workflow builder for daily stand-ups, message reminders, new deals, tickets, and so much more. It’s a beautiful way to build on the 3rd party automations we’ve listed above 🙂
💬 Give us feedback!
We’re just two guys messing around with low-code tools and trying to figure out how best to share that knowledge with people like you 😅. We’d love your feedback on how we could make future letters more relevant to you, and what you’ve enjoyed about these so far!
Here’s our 1-minute feedback form 🤩